 ILS
KRH Keyboard Interface
Order Button at Bottom of this page
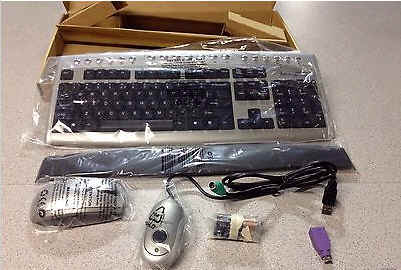
One of the things most Atari users have wanted is a wireless keyboard. But I have now a Keyboard interface that can use DIN 5, PS2, and Some USB Keyboards will function with our KRH and KRH-II. The KRH stands for Keyboard Replacement Hardware. The KRH-II we built is designed to be soldered to the underside of the Atari MotherBoard. so it can be used with other Pokey Hardware that gets plugged direct to the Pokey Socket. For a long time finding a keyboard that would work with RF and not require Drivers was almost impossible to find. But I ran Across a Keyboard that had both a mouse and keyboard receiver. Now this dongle is USB but has an adapter for PS2! This Keyboard configuration should work with all the Different Keyboard interfaces. This is the only wireless keyboard that I have found that fits all of the parameters needed for the KRH and wireless keyboards. I have some cool things hooked up to my KRH.
I have a wireless Keyboard.

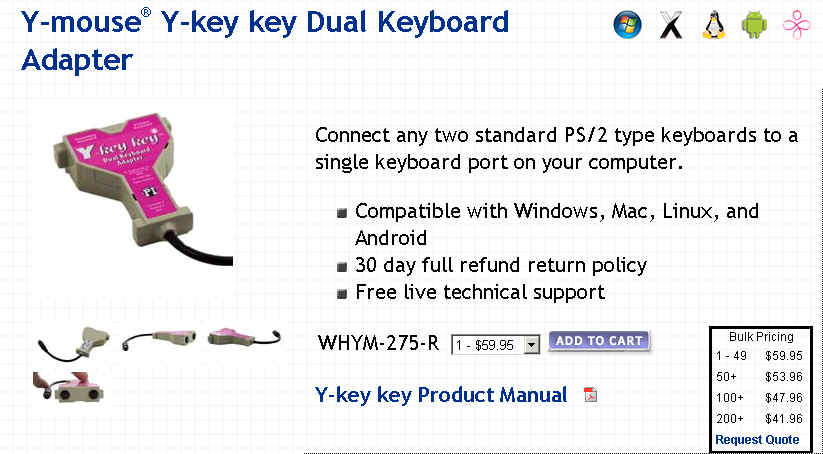
I have a Macro recorder made by Y-Key

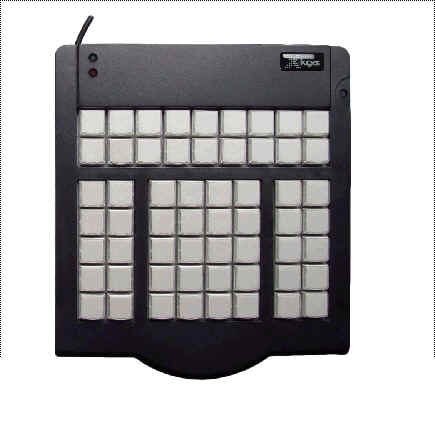
I have a 58 Key Wedge type Macro Recorder with a Din 5 keyboard hookup. CB has a smaller 20 Key Wedge Type Macro recorder. The only thing I had to do to make the Wedge Device work is read the doc's and slow down the macro recorders.

I tried very hard to get devices that would work with the KRH, KRH-II, AKI, and Transkey-II.
##########################################################
The Keyboard Replacement Hardware is very much like the AKI. I own 3 Dataque Transkeys and 2 AKI's. I wanted to purchase more AKI but no one had any. So we sat down and looked at the two different types of PC Keyboard adapters to pick the one that we wanted to create. The TransKey has more functions to it but very hard to find all the chips. After Looking at the AKI which uses a PIC processor it looked like the best way to go. We could not clone the AKI because the PIC that was used in it is no longer available so we search for a new PIC that we could program and would work. We did use the AKI as a pattern to go by, so each of the functions in the KRH is the same as the AKI except for some programming code that the PIC uses for macros Alt+F1 and Alt+F2. Macros ALT+F9, Alt+F10, Alt+F11, and Alt+F12 are all preprogrammed during the test phase all KRHs go through. Macros ALT+F9 through ALT+F12 are user programmable and retain their program in an EEProm installed on the PCB while the system is powered off.
Their are changes made to the KRH firmware that make it different from the AKI. Firmware has these changes made to it.
The "]" Right bracket is a "+" in the AKI but is a "]" Right bracket in KRH
The "." on an AKI Keypad is a "," comma. The "." is correct on the KRH
The "~" is defined as a Clear Screen Character.
Here is a Link to the KRH Keyboard Map:
If your Atari Computer has a Stereo Pokey board in it and you want a KRH I can build a Special KRH that you can solder 10 wires to the bottom of the Atari Mother Board..
So we decided to do a small run of printed circuit boards and sell off the excess KRH's to people who wanted a PC Keyboard interface. Because of the short run these PCB were expensive. We are selling the excess for what they cost us to build. I like the PC Keyboard Interfaces because it allows me to install Atari mother board inside a tower case and then I have all the power to put as many upgrades as I want. Check out my Atari Tower! Also the KRH works with other devices like the KVM (PC type Keyboard, Video and Mouse) switch boxes and macro recorders. Now I can also include VBXE producing RGB video I can swap that with my KVM as well. The AKI and KRH can also use a Y-Key (Dual Keyboard Adapter) and an X-Key (Macro Recorder) from P.I Engineering
The KRH when you first boot it will come up in the English keyboard Scheme but this can be changed to the German Scheme by pressing ALT+F3. The PC to Atari keyboard translation is:
PC-MF2-standard keyboard (English Version, keys 42 and 45 added on German layout)
The PC-keyboard layout is mostly identical with the printed symbols on the keys with the German / English (American) keyboard. The English layout is mostly common with the original ATARI layout, maybe some German PC users prefer their layout.
Key Numbers with several language functions: 3,7,8,9,10,11,12,13,22,27,28,40,41,42,45,46,53,54,55.
Here are the special function keys:
|
PC key |
ATARI-Emulation |
| CTRL-ALT-DEL | RESET |
|
~ |
Clear Screen |
| Shift+Home | Clear Screen |
|
F1 |
ATARI (1200er) F1 key* , also SHIFT
/ CTRL |
|
F2 |
ATARI (1200er) F2 key* , also SHIFT
/ CTRL |
|
F3 |
ATARI (1200er) F3 key* , also SHIFT
/ CTRL |
|
F4 |
ATARI (1200er) F4 key* , also SHIFT
/ CTRL |
|
F5 |
START |
|
F6 |
SELECT |
|
F7 |
OPTION |
|
F8 |
RESET |
|
F9 |
free |
|
F10 |
HELP |
|
F11 |
INVERSE |
|
F12 |
BREAK |
|
ALT-F9 |
Sending macro 1 |
|
ALT-F10 |
Sending macro 2 |
|
ALT-F11 |
Sending macro 3 |
|
ALT-F12 |
Sending macro 4 |
|
CTRL-ALT-F9 |
Recording macro 1 (max. 15
keystrokes) |
|
CTRL-ALT-F10 |
Recording macro 2 (max. 15
keystrokes) |
|
CTRL-ALT-F11 |
Recording macro 3 (max. 15
keystrokes) |
|
CTRL-ALT-F12 |
Recording macro 4 (max. 15
keystrokes) |
|
ALT-F1 |
Sending KRH version number |
|
ALT-F2 |
Sending fixed macro for web site |
|
ALT-F3 |
Switching between German and English
keyboard layout (stays after power off) |
|
ALT-F4 |
Stop macro recording |
* There are some
ATARI models which have keys F1...F4. These keys are supported from the ATARI
OS (also 800/130er OS!) and have following functions:
|
F1 |
Cursor up |
|
F2 |
Cursor down |
|
F3 |
Cursor left |
|
F4 |
Cursor right |
|
SHIFT-F1 |
Goto top of screen (HOME) |
|
SHIFT-F2 |
Goto end of line |
|
SHIFT-F3 |
Goto start of line |
|
SHIFT-F4 |
Goto bottom of screen |
|
CTRL-F1 |
Switches’ off keyboard until
pressing CTRL-F1 (Attention trap!!!) |
|
CTRL-F2 |
Switches off screen until pressing
any key |
|
CTRL-F3 |
Toggles keyboard click |
|
CTRL-F4 |
Toggles charter set (graphic /
international) |
Here is the complete KRH Truth Table Web Page
If you wish to download a KRH Truth-Table.pdf
Here is the Keytest.atr. Use this auto boot program atr to test all the functions of the KRH. It will desplay the Hex value of any key you press as well as the Value of the Consol location, Break and Help Key will also be detected.
Here is a picture of the first PCB I solder parts to and did our first tests on. Tried our PIC Code on and it worked. I was very Happy on how good out PCB turned out and we got out board right the first time no kiner wire. and I am now using this Keyboard interface.


Each ILS Keyboard Replacement hardware Interface Board Costs $40.00 to make and the flat rate shipping is $5.00 Dollars. Each of these boards are hand assembled and tested before shipping. In each package has:

1 ILS KRH interface
Small Length of 60/40 Multi-core Solder
40 pin low profile socket
Start/Select/Option/Reset Wiring harness
PS2 Wiring Harness or 5 Pin DIN AT Style Keyboard
If you buy 1 or up to 10 the cost is $40.00 US Dollars for address inside the United States of America. If you want more than 10 boards e-mail me and we will get a cost out to you. We are building these boards at cost so the price I have up here is finial unless the next time we do a Board run or purchase parts we get them cheaper. The PCB's were very expensive because we did such a small order. If I find there is a greater call for these PCB I will make a bigger order and pass the savings on to you!
ILS Keyboard Replacement Hardware Interface is going to cost $40.00 US Dollars $5.00 Flat Rate shipping inside the USA Plus $10.00 US Dollars OUTSIDE the USA to Europe.
The Cost varies greatly when I have shipped things to Europe in the past. So ILS just wants enough funds to cover any shipping costs greater than $10.00 US Dollars. The $40.00 US Dollars covers the cost of building these boards. If you live in Europe please note these prices are in US Dollars and as of today 1 US Dollar is the same as 0.73 Euros.
KRH Installation Document in English
Select this button if your Shipping address is in USA
SOLD OUT
$40.00 US Dollars for the ILS KRH Interface
$5.00 US Postal Service FLAT Rate Shipping inside the US.
Select this button if your Shipping address is outside the USA
$40.00 US Dollars for the ILS KRH Interface
$10.00 US Dollars for Shipping outside the US. $1.00 Extra for each Board
SOLD OUT